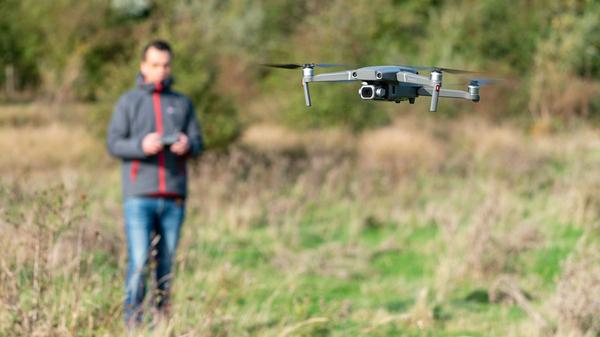
Flying drones these days is incredibly easy and fun, despite the common misconception that they’re difficult use. Drone technology has evolved at lightening speed in recent years, mainly thanks to DJI drones, and it’s now possible for beginners to fly one with relative ease.
That said, there are a few important steps that we go always through to make the whole experience go as smoothly as possible. One of the most important aspects of flying drones is familiarizing yourself with their flight controls, so you know how to control the aircraft, but this is just the tip of the iceberg.
It’s also imperative that you learn about the rules and regulations surrounding the use of drones in your country to ensure that you remain safe and legal at all times. In the UK, you should familiarize yourself with the Drone Code before making your first flight, while those in the US can learn about relevant rules and regulations at the FAA's DroneZone.
All filled in on the latest drone laws? It's time to plan your drone flight and head out to grab some impressive sky shots.
As well as picking a position for safe landing and take-off while at your chosen spot, the first thing you must do before making a flight is make sure that it’s safe and legal to fly. The best app for this is in the UK is NATS Drone Assist (now called Drone Assist Uk, for iOS and Android), which allows you to select your current location using GPS or search for a future location using the map. In the US, the B4UFLY Drone Airspace Safety app (for iOS and Android) does a similar job.
The apps show restricted airspace where you can’t fly without permission in red over the map, while areas where you need to take care are displayed in yellow. They also alert users to NOTAMs (notices to airmen), which are temporary warnings and rules as well as ground hazards and much more.
Most drones shouldn’t be flown in high winds or rain, so it’s important to use a weather app to ensure that the weather is favorable for safe flight. You can use any weather app, but UAV Forecast (available for iOS and Android ) is designed specifically for drone pilots and provides detailed weather information to help you decide whether it’s safe to fly.
UAV Forecast also provides similar information to NATS Drone Assist, detailing where you can and can and can’t fly, but this is much more limited so it’s worth using both apps when planning flights. And best of all, they’re both free for Android and iOS users.
When you first unbox your new drone, you’ll need to attach propellors, charge batteries, install a memory card and link the controller to the aircraft. The companion drone app for your smartphone, which for DJI drones is the DJI Fly app (for iOS and Android), will guide you through the process.
Once this is completed, you’ll need to perform a pre-flight check of battery levels, propellers and the airframe to check the level of charge and for damage every time you fly. Don’t forget to take the online safety test and get your Flyer and Operator IDs (if needed) before your first flight. In the UK, you’ll also need to attach your Operator ID to your drone because failure to do so could result in a hefty fine.
It’s always a good idea to set the Maximum Altitude and Maximum Flight Distance in the main settings menu to ensure that you don’t exceed the maximum perimeters set out by the CAA (UK) and FAA (US).
Within the DJI Fly app, tap the Flight Mode icon and scroll down to the 'Set Maximum Flight Altitude' option. Set the Maximum Altitude to 400ft (120m) and Maximum Flight Distance to 500m (1640ft) to geofence the drone within these distances so you can’t break the law by flying too high or too far away.
Just remember that you must also maintain unaided visual line of sight with your drone at all times – in other words, you must always be able to see it while in the air.
If you’re completely new to flying drones, the DJI Go app (for its older drones) offers a 'Beginner Mode' that can be activated to limit the drone to flying within 30m of the Home Point with speed limited.
This is a great setting that will keep the drone close to you while you learn how to use the flight controls and perform basic flight maneuvers, take-offs and landings.
When you turn on your drone for the first time, and also visit a new location that’s more than 20 miles from the location of your last flight, your drone will generally prompt you to calibrate the compass.
If it doesn’t, it’s still worth calibrating it in the Fly app. Hit the three dots in the top-right of the DJI Fly app and head to the 'Safety' section, before going to 'Calibrate'.
Calibrating the compass will ensure that the GPS is functioning correctly both in flight and in relation to the on-screen map in the drone app you’re using. When you calibrate the compass, make sure it’s performed away from metal objects to avoid magnetic interference.
The main controls you’ll need to use are the two control sticks to fly the drone and the gimbal dial for changing the angle of the camera. The DJI Fly app has an on-screen take-off button that can be pressed to make the drone take-off, or you can pull the left stick to seven o’clock and the right stick to four o’clock simultaneously to start the motors.
Pushing the left stick up will make the drone take-off. Landing can be achieved by pressing the Return to Home button or by bringing the drone to a hover close to the ground and then holding the left control stick down until the drone lands and the rotors stop turning.
The left stick is used to control yaw and throttle. Yaw rotates the drone clockwise or anti-clockwise by pushing the stick either to the left or right, while throttle adjusts the altitude of the drone by pushing the stick forward/up to increase altitude and backwards/down to reduce altitude.
The right stick is used to control pitch and roll. Pitch is controlled by the forward/up and backwards/down movement of the stick and makes the drone move forwards and backwards respectively. Roll maneuvers the drone left and right and is achieved by moving the stick in the relevant direction.
These controls can be combined or used individually depending on what you’re aiming to achieve. But before heading out to capture your first aerial stills and video, take some time to practice using the controls and performing different maneuvers so you can safely embark on your first shoot with competence and confidence.
Most drones use companion smartphone apps that allow you adjustment the settings, as well as view the camera feed and control the camera. Most major drone settings, camera controls and visual information relating to battery life, speed, altitude and distance will be displayed in the app, which needs to be open on the phone or tablet that’s attached to the controller and connected via cable.
In terms of controlling the camera settings and modes, all are accessible through the app and you’ll find that the features and functions on offer are similar to standard mirrorless and DSLR cameras, albeit reduced.
In the image above you’ll see that ISO is set to 100, shutter speed is 1/30sec, aperture is f/5 and the camera is set to shoot in raw. The orange button is the shutter button, and the settings can be accessed by pressing the icon below – it’s really that simple.