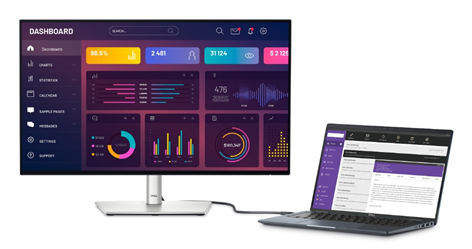
Connecting your laptop to a TV can transform how you stream content, present work, or enjoy games. If your laptop supports USB-C video output, the process is simple and effective. Using USB-C provides a clean, single-cable solution for video and audio. It supports high-resolution displays, including 4K, depending on your device. With the right cable or adapter, you can mirror your screen, extend your display, or watch movies in full screen. This guide explains How to Connect a Laptop to a TV Screen, covering compatibility, setup, settings, and troubleshooting.

Before starting the connection process, ensure that both your laptop and TV support the required ports and capabilities. Here’s how to check for video compatibility and choose the correct gear.
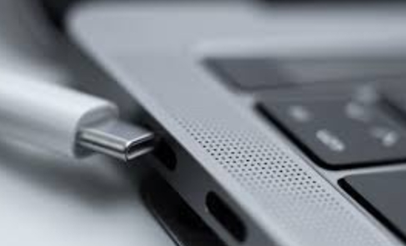
Not all USB-C ports support video output. Check your laptop’s specifications or user manual to see if the port supports DisplayPort Alternate Mode (DP Alt Mode). Look for a small DisplayPort (DP) icon or Thunderbolt symbol next to the USB-C port—this usually indicates video output support. Alternatively, you can search the laptop model online and confirm compatibility. Without video support over USB-C, you’ll need to explore other connection options like HDMI or wireless casting instead.
Most modern TVs do not include USB-C ports but usually have multiple HDMI inputs. Check the back or side panel of your TV to locate available ports. If your TV does have a USB-C port, confirm that it supports video input—it’s rare, but possible in high-end models. In most cases, you’ll need to use a USB-C to HDMI adapter or a cable that bridges USB-C to HDMI. This setup is commonly supported by smart TVs and external displays.
To transmit video and audio from your laptop to a TV, use a certified USB-C to HDMI adapter or cable. Choose one that supports the correct HDMI version—HDMI 2.0 or higher is preferred for 4K resolution. Active adapters are recommended for consistent performance, especially with high refresh rates. Avoid cheap, unbranded cables that may not support full functionality. Check for compatibility with your laptop’s OS and resolution requirements to avoid signal issues or degraded video quality.
Once compatibility is confirmed, gather your cable or adapter and begin the connection. Follow these steps carefully to ensure a smooth setup between your laptop and TV.
Start by connecting one end of the USB-C cable to your laptop’s compatible port. Then plug the other end into your TV’s HDMI input using the adapter if necessary. Ensure both ends are securely connected to prevent signal dropouts. If using a multi-port hub, verify it supports video output and HDMI passthrough. Once connected, your laptop should automatically detect the TV as a secondary display, though it might take a few seconds depending on your device.
Using your TV remote, press the “Input” or “Source” button and select the HDMI port you’ve connected the cable to. TVs often label these ports numerically, such as HDMI 1 or HDMI 2. If nothing appears immediately, try cycling through the input options until your laptop screen shows up. You may see a message like “No Signal” until your laptop fully establishes the connection. Selecting the correct source is essential for the TV to recognize the incoming signal.
Once the TV source is selected, your laptop should detect the TV and begin displaying content. This process can take a few seconds. You may notice your laptop screen flicker briefly—this is normal as the system adjusts resolution and display settings. If the TV remains blank, double-check all cable connections and adapter functionality. It may help to unplug and replug both ends. After successful detection, you can proceed to adjust display settings for the best viewing experience.

Now that the devices are connected, you can customize how the display appears and make sure audio plays through the TV speakers instead of your laptop.
Open your display settings from your laptop's control panel or settings menu. On Windows, press Win + P to select display mode. On macOS, go to System Settings > Displays. Choose from these options: Duplicate (mirror the screen), Extend (use TV as a second monitor), or Second Screen Only (disable laptop screen). Extend mode is great for multitasking, while Duplicate suits presentations. Pick the one that best fits your purpose. Adjust screen positions if using multiple monitors.
Sometimes the audio still plays through your laptop even after the TV is connected. To fix this, go to your sound settings. On Windows, right-click the sound icon > Sound Settings > choose the TV under Output. On macOS, open System Settings > Sound > Output tab, then select your TV. The label may appear as “HDMI Audio” or your TV’s brand name. Once selected, all sounds should route through the TV’s speakers automatically, enhancing your multimedia experience.
Once connected, your TV might not display the picture perfectly. To fix this, open your laptop’s display settings and adjust the resolution to match the TV’s native specs—commonly 1920x1080 (Full HD) or 3840x2160 (4K). Also, adjust the screen ratio or scaling to eliminate black bars or cropped edges. On some TVs, enabling “Just Scan” or “PC Mode” helps improve sharpness. These tweaks ensure clear visuals, proper scaling, and smoother playback on your TV screen.
If your screen remains blank or flickers, don’t worry. These common issues are usually easy to fix with the right adjustments or hardware updates.
Cheap or unverified adapters often cause signal loss or compatibility issues. Use certified USB-C to HDMI adapters or cables that meet HDMI 2.0 or 2.1 standards. Ensure the adapter is compatible with your operating system. Physical damage, bent pins, or loose connectors can also impact performance. Always inspect the cable and ports for debris or signs of wear. Investing in high-quality hardware ensures a stable connection and minimizes the chances of display errors or intermittent video loss.
Outdated drivers can interfere with the USB-C to TV connection. On Windows, go to Device Manager > Display Adapters or USB Controllers, then right-click and update drivers. Mac users should check for system updates under System Settings > General > Software Update. Manufacturer websites often offer the latest drivers for video output. Updated drivers improve compatibility, fix bugs, and enable better resolution support. Keeping your system up to date ensures a smoother and more reliable connection process.
If all else fails, restart your laptop and TV. Power cycling helps reset internal hardware states and clears temporary glitches. After restarting, reconnect the USB-C cable and repeat the input selection steps on your TV. Sometimes, the system needs a fresh boot to correctly detect and configure the display connection. This basic troubleshooting step often resolves signal issues, especially after system updates or driver changes. Ensure the cable remains connected during restart for automatic recognition.
Connecting a laptop to a TV via USB-C is straightforward when the devices support the right protocols and the correct cable is used. You can enjoy high-definition video and audio by simply verifying compatibility, selecting proper adapters, and configuring settings accurately. Whether you're streaming movies, giving a presentation, or multitasking, this setup offers flexibility and convenience. Remember to check for common issues like faulty cables or outdated drivers if things don’t work right away. With this guide, you’re well-equipped to create a seamless viewing experience using just a USB-C connection.
Only if the TV has a USB-C video input, which is rare. Most TVs require an HDMI adapter or cable.
Yes, with a USB-C hub that supports both power delivery and video. Direct USB-C to HDMI cables don't support charging.
No, only USB-C ports with DisplayPort Alt Mode or Thunderbolt support video. Check your laptop’s specifications or port symbols.