This article isn’t our standard review article, instead, this piece explores the fun (and practical?) side of 3D printing and showcases a few prints that anyone can do for their homelab. Let me preface by saying that we don’t own any of the models that we printed. All the models we printed can be found on Thingiverse and will be linked so anyone can go see the model and original creator. For each thing that we printed, we tried to tailor it to general use cases to give the best representation of what can be done.
This article isn’t our standard review article, instead, this piece explores the fun (and practical?) side of 3D printing and showcases a few prints that anyone can do for their homelab. Let me preface by saying that we don’t own any of the models that we printed. All the models we printed can be found on Thingiverse and will be linked so anyone can go see the model and original creator. For each thing that we printed, we tried to tailor it to general use cases to give the best representation of what can be done.
Here at StorageReview, we get a lot of gear in, most of it from the large IT vendors for review. But some projects need something a little different so we hit up a local tech recycling nonprofit from time to time. In a recent case, we acquired a few servers for a project, but they didn’t come with any drive trays.
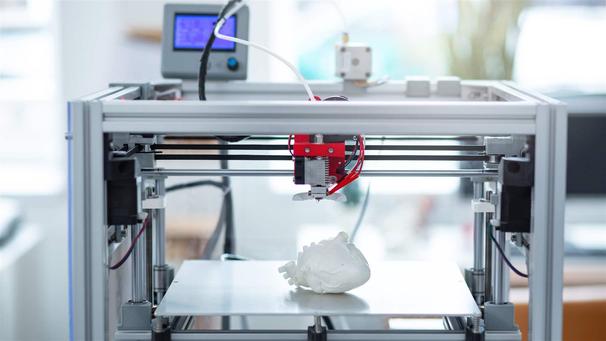
Instead of buying each drive tray OEM or trying to outsource a 3D printer to use, it was actually more cost-effective to just buy a 3D printer. The 3D printer that we bought was the Creality CR6-SE, which retails for about $429. This printer came pretty much assembled right out of the box and was pretty much plug-and-play. Obviously, there are going to be a few bumps with a 3D printer, but nothing too drastic in terms of problems on our end. (We recommend using quality plastic, just to make life easier).
Needless to say, we printed the drive caddies that we needed, but the projects that we were already working on started to pile up, and the side project that we used the printer got pushed to the back. The printer sat alone for a little bit before it saw some use again, which was for this article where we wanted to hunt down productive use cases for the printer.
The Creality CR6-SE is a filament-style printer. There are resin printers out there, however, in our opinion, when it comes to simple things like homelab accessories, a filament printer may easier to use. Resin printers have more extensive setups and clean-ups, so keep that in mind.
The models that we chose to print are what we believe are generally useful with multiple use cases. Each model that was printed can fit into almost any homelab environment.
The first model that we chose to print was a USB Flash Drive Holder with support for SD cards and micro SD cards. The exact model can be found at the link here: USB SD and MicroSD holder. We picked this as our first model since we felt that it is something that everyone could use because who doesn’t have a couple of extra flash cards laying around. The card holder makes organizing and keeping track of those pesky drives a little easier.
The USB SD and MicroSD holder was a great first addition to our homelab models. Each flash drive and SD card that we tested in it stayed stationary and held it well. We didn’t have any problem printing this model nor did we change any of the settings in our slicer that we used. Overall, it is a simple yet effective 3D print, however, there are models out there that have more or less slots if need be.

The second model that we chose to print was an Ethernet cable organizer. The exact model can be found here: Ethernet Cable Runners. These are a great thing to print especially since cable management can be a bit tricky and these will make managing cables a lot easier. These cable runners could also be used for other cables, it doesn’t have to be just Ethernet cables.
Our use case for the Ethernet Cable Runners wasn’t the end all be all for our cable management. We have a pretty large lab here so using simple cable runners isn’t always the best option. However, if these are going in a small setting, they will fit right in especially with the different sizes that the creator offers.
The next model that we chose to print was kinda specific to our lab but could be useful to others. The model was of a hose holder, which can be found here: Schlauchhalter, Hose Holder, Cable Holder. We know that sounds funny but we printed it for a reason. Some cables like fiber optic cables are fragile and shouldn’t really be bent. So we decided that a hose holder actually works the best in our case. We did do some slight modifications to it, we stretched one of the axes so that it gives us even a bigger bend, however, printing it normally will work just fine.
The Schlauchhalter, Hose Holder, Cable Holder is probably the most essential model that we printed. We have a ton of cables and this simple model offers a great way to store them, especially the ones that really can’t be bent. In our case, we are probably going to use a command strip on the back to stick it to the wall so we have to make holes. If holes in walls aren’t a problem, however, the hole for the screw that the model has is pretty nice.
The fourth model that we printed is actually my favorite, stackable hard drive holders, which can be found here: HDD Hard Disk Drive Stacker. This model is really cool because it is a simple way to stack hard drives and offers a bracket to attach that has compatibility to hold a fan. We wanted to print this model off because of the versatility it has. A couple of the ideas we had for it would be making it into a NAS or simply using it as a way to organize hard drives.
When we printed the HDD Hard Disk Drive Stackers, they came out really well. When putting the hard drives in each stacker, it was a little snug, but it’s better for them to be tight to give peace of mind that they won’t move. This print pairs nicely with a future project of an at-home NAS that we might be pursuing.
The next model that we printed off is something that pretty much anyone can use if they like to work on technology or work with small pieces. The model that we printed is a screw tray. This is such a simple thing to print and a great way to organize screws, nuts, or other small objects that are easy to lose and difficult to find. The model can be found here: Customizable Magnetic Screw Tray/Box (with optional lid). What’s really cool about this model is the different size options that the creator has to print. We chose to go with the “screwtainer” option, which has different size holes for different size screws or other miscellaneous things.
The Magnetic Screw Tray/Box is a nice model to have. We actually printed two just so we can have them in a couple of different places so when we are taking things apart or using small screws, we don’t lose them. This model also comes with a lid option so carrying around extra screws, nuts, washers, rubber spacers is super easy. For assembly it requires 8 small magnets which aren’t hard to come by, however, in our use case, a lid wasn’t necessary.
The last model that we chose to print off is an M.2 SSD holder. We thought to print this model off because of the numerous M.2’s we have laying around that probably have a better chance of being stepped on than used. This model can be found here: PCIe SSD Holder, 16 pcs. This model is the most simplistic that we printed, just a couple slots in a bar, however, it offers us a better way to stay organized and not lose a bunch of M.2’s that we have in bins.
This model was a more specific one for us as a normal person probably doesn’t have 16 M.2’s laying around that need to be organized. However, what this goes to show is just how customizable anyone can make their homelab. With a 3D printer, printing whatever is needed on-demand is such an amazing thing especially with how inexpensive 3D printers are becoming.
These models are just some of the things that can be printed for a homelab. With a 3D printer, the possibilities are almost endless when it comes to things that are able to be printed. In our case, each of the chosen models works for us, that’s not to say it’s going to work for everyone. Every situation and homelab is going to be different, which is why a 3D printer is awesome. Plus this guide helps you out if you got one of these toys for Christmas and need ideas to get started with.
The following models can all be found at Thingiverse:1. USB SD and MicroSD holder for wide USB sticks2. Ethernet Cable Runners3. Schlauchhalter, Hose Holder, Cable Holder4. HDD Hard Disk Drive Stacker5. Customizable Magnetic Screw Tray/Box (with optional lid)6.PCIe SSD Holder, 16 pcs
Our Printer:Creality CR6-SE
Buy From Amazon
Engage with StorageReview
Newsletter | YouTube | Podcast iTunes/Spotify | Instagram | Twitter | Facebook | TikTok | RSS Feed