Seam validation technology at Lockheed Martin was originally developed for the F-22 Advanced Tactical Fighter to ensure the proper performance of each aircraft. Gaps and mismatch (or step) were called out on drawings and condensed into a chart for use on the production floor. The gaps were then measured using feeler gauges, while the mismatch was measured using micrometer height gages.
Using such methods to obtain data presented limiting factors. Only straight seams could be measured Furthermore, data was recorded manually.
Development and Testing:
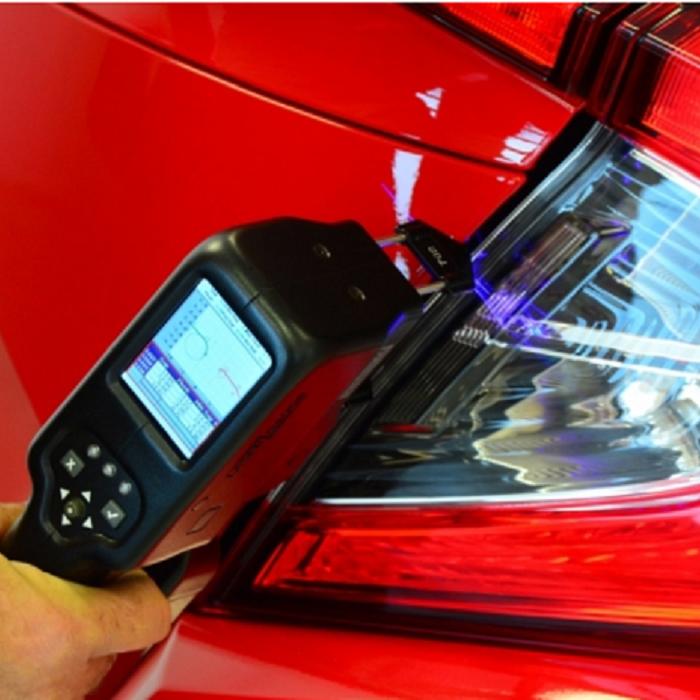
After performing a series of tests, the decision was made to switch to the Third Dimension GapGun optical measurement system. The GapGun is a 2D measurement system that analyzes the cross-section of a seam by projecting a laser line which is captured by a digital camera. Software analyzes a series of images to provide the desired gap and mismatch information. The GapGun system provided drastically higher repeatability and reproducibility than hand measurements. It also gave the operators the ability to measure beveled gaps, and digitally store Gap and Mismatch callouts while increasing the speed of measurements.

Further optimization of the GapGun implementation at Lockheed Martin allows algorithms to be processed on a network, rather than on a computer. This made it possible for any changes to software tools, check plans, or reporting to be tested at a development site, and then downloaded directly onto multiple GapGuns from a docking station. This allows the operators on the factory floor to have the most current inspection plan. This network-based solution provided the ability to seamlessly manage configuration control over the measurement systems on the production line, easily download check plans, and quickly upload results for the many seams on the aircraft.
According to Lockheed Martin, one of the biggest benefits of the GapGun has been the ease of use for the operators. The GapGun software gives operators a clear check plan including photos to guide where to inspect. Data is transferred while the system is being recharged at the docking station and the GapGun gives immediate results on the PDA screen with analysis resulting in a green/red, go/no go result defined by the tolerances set.
Since Lockheed Martin has made the GapGun part of their normal inspection process, the GapGun has advanced even more with the release of the GapGun Pro2 with a T60. The GapGun Pro2 with T60 is even faster with higher pixel density.
A new Violet Laser provides advantages over red or blue lasers on many materials. The very short wavelength makes it possible to measure complex surfaces including combinations of chrome / metal, transparent / chrome, transparent / metal.
The GapGun Pro2 T60 can run for 8 hours continuously with the battery pack. Operators stress the benefit of the GapGun being light and comfortable to hold in one hand. The GapGun Pro2 is also now more water and dust resistant to ensure endurance on the factory floor.
In addition to aerospace, the advanced capabilities of the GapGun Pro2 are also being adopted by the automotive industry where it has been tested on more than 50 types of vehicles from 8 vehicle manufacturers. Operators at one of the major car manufacturers stated that it is probably the fastest digital measurement system in the market. The ability to measure challenging automotive surfaces (including light clusters, chrome, bare and painted metals, and plastics) has been a game-changer. An added bonus is the ability to measure with or without standoffs (for fully non-contact measurement).
For more information: www.accurexmeasure.com